Wednesday, September 16, 2009

I Just Set up a Ravelry Store

I just spent the past half an hour setting up a store on Ravelry, to experiment with selling patterns there. Most of my patterns are free, but I thought it would be interesting to see how it would go putting my latest hat design out there for two clams.

The new design is called the Walker. It's a felted, peaked cap. The peak doesn't require any cardboard or plastic inside, and the shaping is pretty simple. I felted mine by tossing it in the towel load and washing it hot, then wearing it until it was dry.

Here are a couple pictures. There are more on Ravelry.


The store setting-up process on Ravelry was not as hard as I thought it was going to be. They have some weird user interface things on there, especially that the save button for adding a pattern to your store is hidden toward the top left of the page instead of down at the bottom, under the pdf upload section, as you'd expect it to be. Generally, though, it's not too hairy.

Can't wait to see if anyone will shell out for the pattern now!

Monday, September 14, 2009

Peaked Cap Version Two: City Slicker

I knit up this new version of the hat I made this weekend. It's using the same formula, but the brim is a lot wider and the crown is pointy with a nubbin on top instead of so roundy. I also used seed stitch for the brim and edging instead of a rib. Coming next will be a top-down version with maybe some more complicated shaping in the bill.

I don't know the difference between a bill, a brim, and a peak.

Here's the pdf of this particular hat pattern, if you want to knit it up yourself.


Saturday, September 12, 2009

Hat With a Brim

Using Shazzas Brimmed Hat Pattern as a rough guide, I came up with this very basic recipe for making a hat with a brim. These are instructions for making a hat similar to this one, using whatever yarn and needles you want. I'll write up the pattern for making exactly the hat in this picture soon.
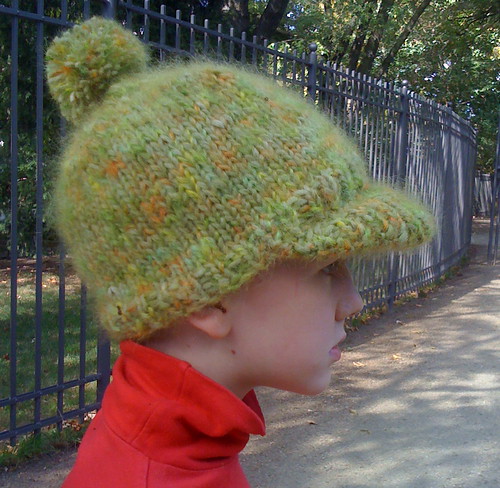


Brim Hat Formula as PDF. This PDF has the picture of the hat, plus information about figuring out gauge and how many stitches to cast on.

How to Make a Brimmed Hat
Pick whatever yarn and needles you want to use.
Make a swatch.
Get your gauge.
Figure out how many stitches you need to cast on for the size of head you have. You should measure your head, subtract 2 centimeters, and then round down to a number divisible by 2 or 4 depending on the rib you want.

You might use a needle a couple sizes smaller to cast on however many stitches you need, especially if you are using fatter needles and yarn.

Cast on.
Place a stitch marker at the begining of the round.
Work in desired rib for a few rounds. 4-6 rounds are nice, but you can do as many or as few as you like.

Change to the needles you did your gauge in if needed.
Knit in stockinette until the hat is big enough to start reducing. This depends on your taste. I like the hat to cover my ears so I knit until the hat is about 12 cm tall.

Reduce.
The method you use to reduce will determine the shape of the hat. Split the stitches into equal sections. The sections have to be even, however many of them there are. I like to reduce in 4 or 5 sections. You can reduce one stitch on either side of the stitch marker, or just on one side. You can reduce every row, or you can reduce every other row, every third row, or whatever. The top of the hat can be round, baggy, flattish, or pointy depending on how you do the reducing.

Break off the yarn and close the top of the hat with the tail.

Brim
Using your mad math skills, figure out how many stitches to cast on to make 8 cm. You can also make the front of the brim less roundy and more square by casting on more stitches here.
Knit two rows in the same rib you used on the edge of the hat.
Cast on 2-4 stitches at the beginning of each row until the brim is as wide as you want it to be. 10-14 rows should do the trick. The fewer stitches the more pointy the arc of the brim will be. The more you cast on, the roundier it will be.
Work 1 row without shaping, cast off.

Brim underside
Cast on enough for 7 cm, or 1 cm less than you made the brim.
Knit 2 rows in either stockinette or seed stitch, as you prefer.
Continue with whatever stitch you chose, casting on the same number of stitches at beginning of every row as you did for the brim, but do this two rows fewer than you did for the top of the brim. For example, if you increased 10 times for the brim, only increase 8 times for the underside.
Work 1 row without shaping, cast off.

Finishing
Sew in ends.
Sew the two sides of the brim together and turn it so the seam is on the inside.
Sew the brim to the hat. I did this by placing the brim flat against the outside of the hat and sewing the three thicknesses together. Careful at the corners, to make them look nice.

Friday, July 17, 2009

Norwegian Purl Technique


I found this via the Knitty blog. I've seen people do this before but have never figured out how it was done before. I tried it out last night. Not too hard, but will take some practice before it becomes automatic. This is going to make ribs and seed stitches a lot faster.

Sunday, June 28, 2009

Saartje Style for the Grown Ups

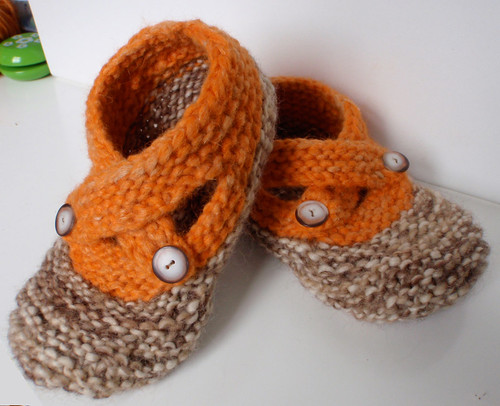
I finally finished working out the pattern for the adult-sized slippers. Here's the pattern pdf. They are a little more clog-like and less roundy than the smaller size, but still pretty cute.


You can definitely fudge the sizes larger or smaller by changing needle size or yarn weight. I did a try with bulkier yarn following the pattern exactly and got about a size 39 (US 8). They're very quick to knit. Don't be afraid to mess around with the gauge for sizes.

Queue them up on Ravelry.

Friday, June 12, 2009

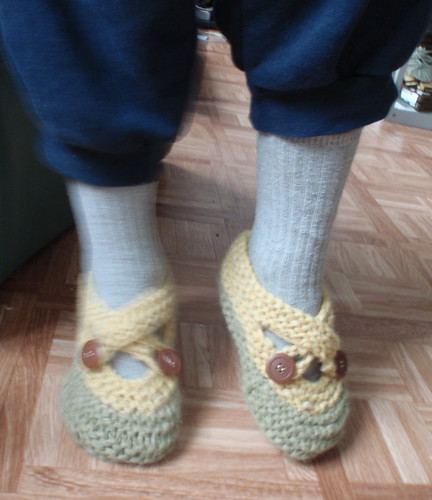
Saartje-Inspired Big-Kid Slippers

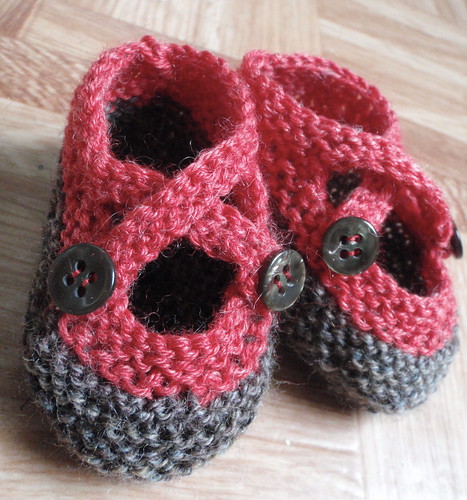
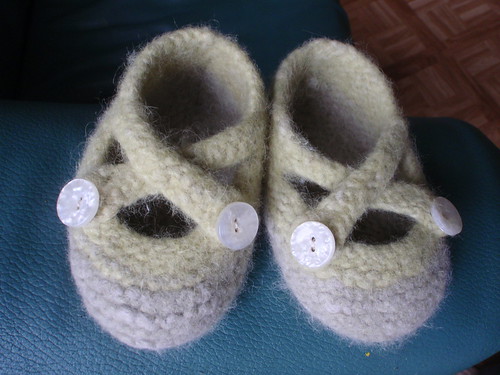
I have been knitting booties by designer Saartje de Bruijn for a few people I know who are expecting babies. I think these are the cutest booties I've ever seen. Vigo loved these little booties so much he would come up to them and give them a kiss. He really wanted a pair of his own. I first tried just knitting the booties with fat Aran-weight yarn and fat US9 needles, but the shape was just not right. Too floppy, too big, ill-proportioned.

I tossed that first experiment into the washer on hot and they came out very cute as a toddler-size felted slipper.

For the next experiment I tried some short rows in the toe, and the slippers came out just perfect for Vigo's little feet. I've written up the pattern, which you can get here: Saartje-Inspired Big-Kid Slippers pattern as a pdf

Here are pictures of the Big-Kid Slippers and the other booties I've been knitting.


Saturday, May 16, 2009

On Needles

* Old Shale Baby Blanket: Ravelry Project Link, Free Pattern

* German Stockings: Ravelry Project Link, Pattern Link

* Cabled Fingerless Gloves: Own design, somewhat stalled

* Rag Scarf Number Two: Still getting the fiber combination right

* Raglan Cardigan for Vigo: Totally stalled

Lace

I've been thinking about knitting the famous Hemlock Ring Blanket for a long time, but I want to try some other lace patterns first, so I can learn how to read the lace charts and figure a few things out ahead of time. The blanket is basically a lace doily pattern that has been adapted to be knit on much larger needles with much fatter yarn.

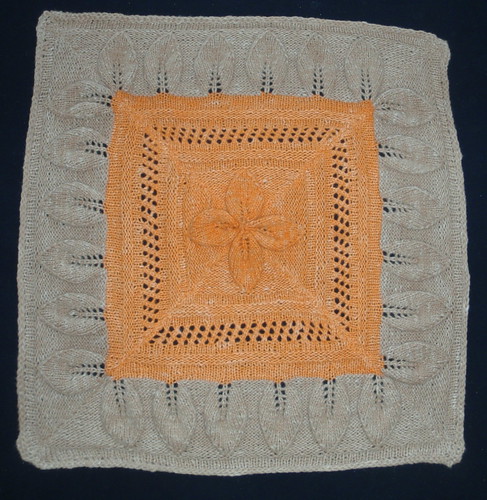
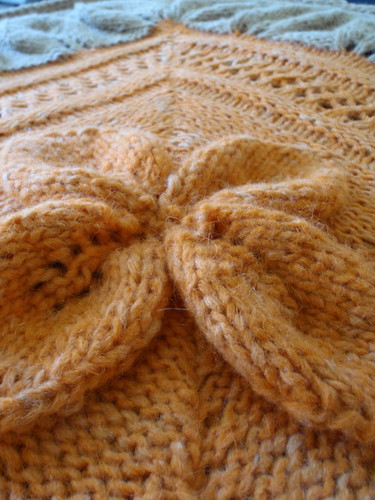
My first experiment is a baby blanket that I made for Justine's daughter Sienna. The pattern comes from Knit Wiki and is called Beadspread (Counterpane with Leaves). You're supposed to knit an ungodly number of triangles and then SEW them all together (the horror). I used fat needles and yarn and made four triangles to create one large square, big enough for a baby blanket.


I learned a lot of things about lace knitting from this project. Number one, don't try to drink alcohol and knit lace patterns. Also, after every pattern row, count them stitches and make sure you didn't miss a yarn over somewhere. That can also be done while you're knitting the plain row. It's easy to pick up a yarn over. If you make a mistake, you have to frog a little. Tough luck. Don't try to finnagle.


Sunday, March 15, 2009

Bike Stuff

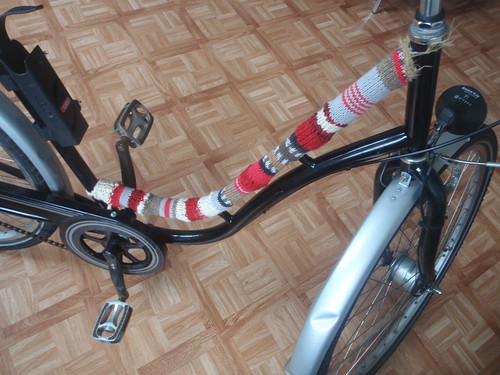
A long time ago, I started knitting a sweater for my bicycle. Today, because I had the bike in the house doing some maintenance, I decided to put the sweater on the bike. I don't care much for the look of it, and I think I am going to do something else, but I will leave it on for a while to see if it grows on me.


Out of curiosity I went on Ravelry to see what other people might be doing for their bikes and of course I found a lot of projects. All images link back to the profile pages of their creators on Ravelry and I don't think they will work if you aren't logged in.

More Bike Cozies

bike Picture 45.png Picture 49.png Picture 50.png Picture 57.png Picture 58.png Picture 62.png

Seat Cozies

Picture 47.png Picture 61.png Picture 56.png Picture 63.png Picture 59.png Picture 64.png Picture 65.png

Bike Racks

Picture 52.png Picture 53.png Picture 54.png Picture 41.png Picture 60.png

Locks

Picture 40.png Picture 44.png Picture 48.png Picture 66.png

Attempted Helmet Improvements

Picture 42.png Picture 43.png

Baskets and Such

Picture 46.png Picture 67.png Picture 69.png

Other Cute Stuff

Picture 51.png Picture 68.png

Saturday, February 14, 2009

Skyline Hat

I've been intrigued by double knitting for a while now. It's a process where you knit with two colors to make a doubled, reversible pattern. The same technique can also be used for doing things like knitting two socks at one time.


About two years ago, my friend Eric was going around town wearing a grubby old hat with a huge moth hole right in the front of it and I said that I would knit him a new hat. Of course, his wife replaced his hat well before I got around to knitting one. I decided that fulfilling my promise of hat creation could be a good opportunity to also learn this new technique, so I went on Ravelry and found this excellent hat pattern, uncreatively but descriptively called double knit earflap hat.

This is an excellent, excellent pattern. The shape is great. It looks good on a kid or a grown up. It feels wonderful on your head. I am definitely going to be using this one again. It was $5 very well spent.

The designer is called Giftable Designs.

Tuesday, January 20, 2009

My Friendly, Friendly Device


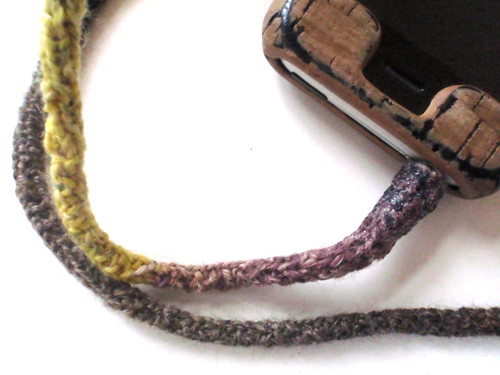
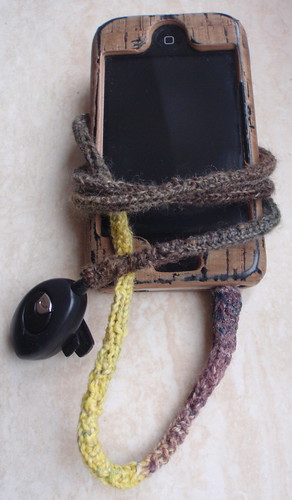
I have this adapter which allows me to talk on my phone using any normal headphones. It has a mic and a volume control, and a button that answers the phone. It's a great iPhone accessory. Unfortunately, it's a bit shabbily put together, and the wires started to pull out down near the jack that goes into the phone, so I had to repair it with electrical tape. To hide the repair and to protect the tape from coming off, I knit this cable cozy, which I think wonderfully compliments my cork cell phone case.