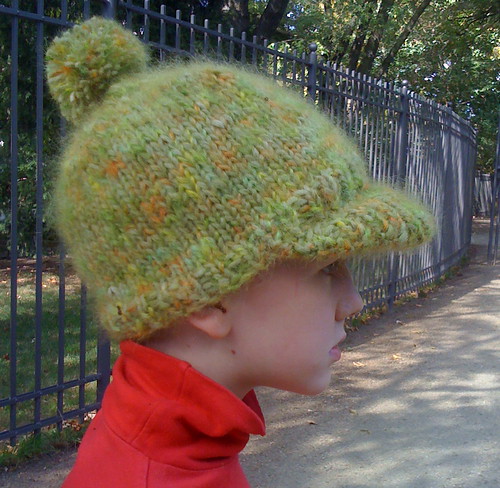
Brim Hat Formula as PDF. This PDF has the picture of the hat, plus information about figuring out gauge and how many stitches to cast on.
How to Make a Brimmed Hat
Pick whatever yarn and needles you want to use.
Make a swatch.
Get your gauge.
Figure out how many stitches you need to cast on for the size of head you have. You should measure your head, subtract 2 centimeters, and then round down to a number divisible by 2 or 4 depending on the rib you want.
You might use a needle a couple sizes smaller to cast on however many stitches you need, especially if you are using fatter needles and yarn.
Cast on.
Place a stitch marker at the begining of the round.
Work in desired rib for a few rounds. 4-6 rounds are nice, but you can do as many or as few as you like.
Change to the needles you did your gauge in if needed.
Knit in stockinette until the hat is big enough to start reducing. This depends on your taste. I like the hat to cover my ears so I knit until the hat is about 12 cm tall.
Reduce.
The method you use to reduce will determine the shape of the hat. Split the stitches into equal sections. The sections have to be even, however many of them there are. I like to reduce in 4 or 5 sections. You can reduce one stitch on either side of the stitch marker, or just on one side. You can reduce every row, or you can reduce every other row, every third row, or whatever. The top of the hat can be round, baggy, flattish, or pointy depending on how you do the reducing.
Break off the yarn and close the top of the hat with the tail.
Brim
Using your mad math skills, figure out how many stitches to cast on to make 8 cm. You can also make the front of the brim less roundy and more square by casting on more stitches here.
Knit two rows in the same rib you used on the edge of the hat.
Cast on 2-4 stitches at the beginning of each row until the brim is as wide as you want it to be. 10-14 rows should do the trick. The fewer stitches the more pointy the arc of the brim will be. The more you cast on, the roundier it will be.
Work 1 row without shaping, cast off.
Brim underside
Cast on enough for 7 cm, or 1 cm less than you made the brim.
Knit 2 rows in either stockinette or seed stitch, as you prefer.
Continue with whatever stitch you chose, casting on the same number of stitches at beginning of every row as you did for the brim, but do this two rows fewer than you did for the top of the brim. For example, if you increased 10 times for the brim, only increase 8 times for the underside.
Work 1 row without shaping, cast off.
Finishing
Sew in ends.
Sew the two sides of the brim together and turn it so the seam is on the inside.
Sew the brim to the hat. I did this by placing the brim flat against the outside of the hat and sewing the three thicknesses together. Careful at the corners, to make them look nice.